One of the issues many bike commuters come across is what to do with those pesky work clothes. You don't want to wear them to work for fear of wrinkling them or worse getting them all sweaty, you don't know where to put them on the ride in, and you may not know where to store your clothes at work. Trust me we have all been here, and most of us have found an effective method that works for our specific situation, hopefully we can help you do the same.
If it is impossible, as it usually is, to wear your work clothes during your commute then you must first figure out what you will wear during the commute and how your work clothes will manage to get to work; not to mention that you have to find a way to get into them. Managing all this may seem hard, but really it just takes careful planning and a little research.
First things first, you should figure out if you have the ability to change/shower at work. Personally I don't have the opportunity to shower at work, though I can and do change in the locker room. Since I don't have the ability to shower, and since I have an infant and a toddler at home, I keep baby wipes in my locker to wipe the sweat away and freshen up; I tend to wait around for four to five minutes until I stop sweating and begin cooling down. Also I find it helpful to keep deodorant and body spray in my locker.
Saying that you have the ability to change at work, you should then find out if you have sufficient space to store your change of clothes, including shoes. As mentioned above I have a personal locker at work, and I keep my clothes there. Some people actually keep their clothes in their desk or file cabinet, I have even heard of someone storing their shoes in the empty freezer of the break room--though I don't recommend that. If you don't have some sort of storage readily available go to your employer and mention that you are a bike commuter and ask if they would be willing to help you and any other bike commuters out by allocating a locker type area.
Saying that you have taken care of those things the next task is figuring out how we are to get our work clothes to work. The method that I have found most effective is to load up my bike on the first work day of the week with enough clothes to make it through the week, which by the way I only take one to two pairs of pants and four shirts(I work four 12 hour days). I use Wald rear folding baskets and reusable shopping bags to transport my clothes to and from. On the second day I take a set of clothes home and again on the last day of the work week.
Though this method is what works for me there are other methods. I know some bike commuters that actually drive to work on Monday and Friday, then ride the middle of the week. Another variation of this is to drive into work Monday morning, carrying your bike with you, along with your clothes and other things. Then ride home from work Monday evening, then to and from Tuesday through Thursday, finishing by riding into work on Friday morning and driving home that evening. With that method you give yourself the option of only needing to drive the car twice per week and the option to carry all your stuff in one big load.
Once you work the kinks out, deciding what to do with your work clothes just becomes another part of the routine. Another note, if you don't have a rear rack on your bike, you can opt to use a backpack and store your change of clothes in there, almost like a portable locker. The only problem I have with using a backpack is that it makes my back very sweaty and on longer rides it becomes very uncomfortable. Don't let that discourage you though, I used a backpack for three months before switching to the rear rack.
Hope this helps!
-MC
Saturday, January 31, 2009
Safe Bicycle Passing Bill Meeting
This Monday evening, Feb. 2, at 7pm, the Fort Worth Bicycle Association (FWBA) is hosting Bike Texas Executive Director Robin Stallings at their meeting. Mr. Stallings will be speaking on up-coming legislative efforts related to safe cycling access and funding in our state capitol; specifically this year's Safe Passing Bill for Cyclists. I strongly urge each of you to check your schedules and attempt to make this meeting.
Please come out to this meeting and show there are a lot of interested cyclists in Fort Worth, Tarrant County, and North Texas.
I believe its a great thing that FWBA has invited Bike Texas to speak at this meeting and I greatly appreciate their sharing this event with other clubs and cyclists like ourselves. Increased awareness and forward movement on greater/safer bicycle access in our region is not an individual need, nor can it be accomplished by a single club; however, when cyclists gather together we are a majority standing before our local, regional and state representatives... lets all show-up and learn more about this year's process and show this region is concerned.
Details about this Monday's meeting:
Date: Monday, 2 Feb 2009
Time: 7:00pm
Location: 3500 Camp Bowie Blvd, Fort Worth
The meeting will be held at 7:00 pm on Monday
February 2 at the University of North Texas Health Science Center, 3500 Camp Bowie Blvd.
Fort Worth, TX, Building #2, room 2-100.
Map: http://www.fwbaclub.org/membership/meetings.cfm
Wednesday, January 28, 2009
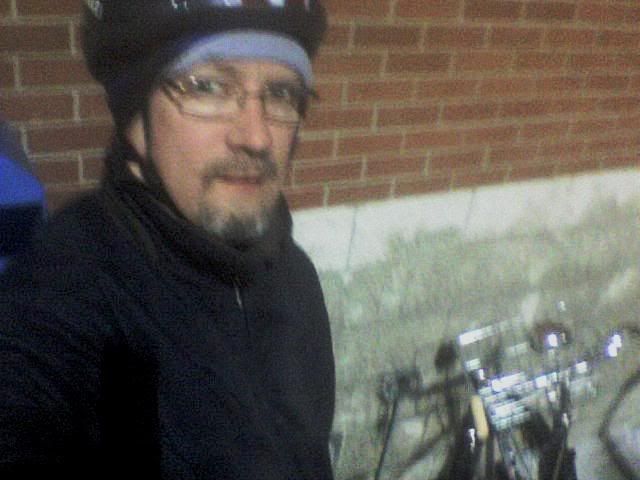
A little cold for cycling but
...I just couldn't resist a quick ride to the grocery store tonight.
No exciting scenery shots, just some crappy cell phone pics of me and my DL-1 at Albertson's, picking up some groceries.
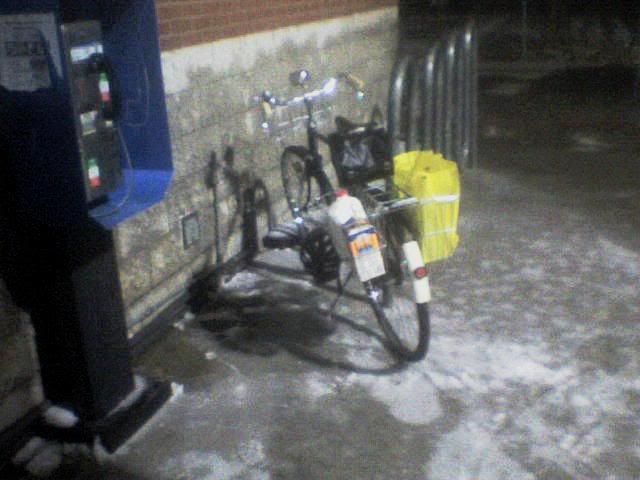
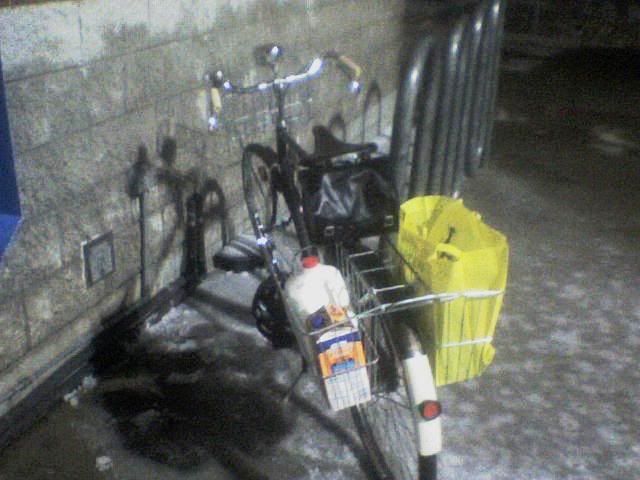
Yeah, that's ice on the sidewalk.
No exciting scenery shots, just some crappy cell phone pics of me and my DL-1 at Albertson's, picking up some groceries.
Yeah, that's ice on the sidewalk.
Tuesday, January 27, 2009
Monday, January 26, 2009
The Care and Feeding of Wheels
A couple of tips for bicycle commuters regarding wheels and tires
. Have spare tubes and tires on hand for your bike.
. Carry a spare tube with you on your commute, along with tools to change a tire. To change a tire you need tools to get the wheel off the bike (if you don't have quick-release hubs), tire levers to get the tire off the rim to get to the tube, and a way to pump up the tire (either a pump or a compressed CO2 cartridge).
. Anti-flat measures are good. There are several; it doesn't hurt to use more than one, including anti-puncture tires, thick-walled anti-puncture tubes, and/or anti-puncture liners that go inside your tire. There is also tire slime which goes inside the tube and is supposed to seal leaks, but my mechanic says that if you get a big tear your wheel turns into a gooey mess.
. Have a good floor pump at home and frequently check your pressure and inflate the tires when necessary.
. If at all possible, keep a second set of wheels for your bike in case you damage or bend a wheel.
. Learn a little bit about truing your wheels and adjusting spoke tension. If your wheel is way off, it's probably a good idea to get it trued by a bike mechanic, but if it's out just a little bit, you can true it yourself with a spoke nipple wrench. Bicycle Tutor has a pretty decent primer on the subject.
Sunday, January 25, 2009
Winter Commuting
Commuting by bike in the winter is a heck of a lot easier than you would think. With the proper clothing, equipment, and attitude it can be done in a cinch.
Clothing
When it comes to cycling in the cold, the most important thing to remember is to wear layers. I have ridden in temperatures all the way down to -4 degrees F and been completely fine with proper layering.
Top Half: I base my layers upon the relative temperature outside, but what works for me may not work for everyone, so I suggest experimenting with your own body in this case.
40-50 Degrees F: Normal wear, meaning a wife beater and a long sleeve tshirt, with a wind breaker on top.
32-39 Degrees F: Moisture wicking base layer(such as under armour cold gear, or wool shirt), followed by either a long sleeve tshirt or a lightweight long sleeve wool shirt. Wind breaker on top as before.
20-32 Degrees F: Moisture wicking base layer, wool sweater, wind breaker.
0-20 Degrees F: Moisture wicking base layer, jersey or another moisture wicking tshirt, heavy wool sweater, wind breaker.
Below 0 Degrees F: The lowest I have ridden in was -4, with wind chill of -21; I wore Moisture wicking base layer, light wool sweater, heavy wool sweater, wind breaker; I was completely warm on top and dry.
Bottom Half: Now your legs are a little trickier to pin point, they warm up quicker than anything else since you use them the most.
40-50 Degrees F: I just wear normal pants, usually jeans or windproof running pants.
25-39 Degrees F: Thermal lined wind/waterproof running pants(picked them up at Goodwill for 3 bucks).
15-25 Degrees F: Either thermal underwear(long johns) or moisture wicking base layer, either jeans or wind/water proof pants.
(-) 0-15 Degrees F: Thermal underwear, thermal lined wind/waterproof pants, windbreaker style pants.
Extremities: These are very important, since they will be the first parts of your body which can sustain frostbite.
40-50 Degrees F: Light gloves(if any), normal crew socks and running shoes, ear band(fleece ear band sold in sports stores for around 5-10 dollars)
25-40 Degrees F: Heavy half glove/half mittens(purchased at a Tractor Supply sotre for 6 dollars, they are half finger length gloves that have a mitten piece than can be pulled over your fingers when needed...perfect for most any weather.) Wool hiking socks(smartwool 10 dollars) running shoes, fleece balaclava for head.
10-25 Degrees F: Heavy glove/mittens; wool hiking socks, thick crew socks, leather boots; fleece balaclava--and depending upon the weather a helmet cover...I use a plastic shopping bag...but Nashbar makes a fancy one for 20 bucks.
Anything below 10 F: Light gloves, heavy gloves/mittens; wool hiking socks, heavy wool socks, hiking boots; fleece balaclava, fleece ear band, helmet cover.
As I said these are examples of what I wear, you may need to adjust things a little to get comfortable. The general rule of thumb is when you walk outside you should feel a little chilly, not cold, by the time you pedal through your first mile you'll be warmed up just fine. Always make sure to inspect your bike before leaving so you can potentially avoid stopping and being out in the cold for long periods of time. If you feel you have under dressed, don't be afraid to turn around and go get another layer--better safe than sorry; if you feel you have over dressed, pedal easier or remove a layer, but never your outer wind shell...it is the most important layer.
Equipment:
To be successful at commuting during the winter you will need a few extra things for the bike that you will not usually need in the spring-summer-early fall months.
Lights: In the late fall and through the winter most of us deal with it being dark when we leave for work, and dark when we ride home at night. Though lights aren't necessarily for the cyclist's benefit, they are actually important so drivers and other riders can see you going down the road. Therefore lights are very important for winter cycling. You should acquire at least a head light and a tail light. I have a P7 flashlight which is one of the brightest lights you can purchase, I bought mine off of DealXtreme.com for 90 dollars with a mount, two batteries, the light, and a charger. For my tail light I have a Cateye TD1100 it has 10 bright led lights that have 5 different flash sequences to catch drivers attention, for a while it was the brightest light of it's kind, now there are brighter, but this one is still sufficient. The general rule is: The more lights you have on the bike, the better off you are.
Fenders: Some riders will disagree with the importance of fenders for winter cycling, but I am a firm believer in not having water/mud/snow spray all over my back and especially not all over my face. The concept is pretty simple, it is more likely to be wet in the winter...therefore you will need fenders.
Snow Tires: Now in Central KY where I live we don't get a ton of snow, usually we get one or two significant snowfalls per year. Therefore I merely have a back up set of wheels for my commuter bike that has knobby, mountain bike tires on them. It has snowed once this year around 6 inches and I spent nearly 2 hours riding around and having fun in the snow without any problem with the back up wheels.
However in areas that get more snowfall than a few inches per year might consider investing in a set of studded tires. Studded tires are usually mountain bike style tires with sharp pieces of metal sticking out of the knobs all over the tire. These studs actually give you a better grip when turning or trying pedal in thick snow/ice.
Homemade Emergency Kit: I personally believe it is better to be safe than sorry. Now my work is only 1 mile away from my house at the shortest distance, though I frequently extend my commute to being 5 miles or more each way. Therefore I could technically get by without an emergency kit, but it is best to have one. This is not anything elaborate, merely a few additions to your seat/frame bag/ backpack/pannier. An emergency blanket--you can get them online or in any first aid kit you buy at a drug store. Cell Phone--sure most of us already carry a cell phone, but if you don't have one, it may be a good idea to get a cheap prepaid cell phone with 20 minutes or so for emergency calls. Food-Be it a powerbar, a piece of fruit, granola, trail mix, or whatever you wish that is along those lines--if something was to happen and you were stuck walking in the cold or you were injured the food would act as a source of energy, and can warm you from the inside. Finally 20 dollars--You never know when conditions could turn for the worse and you may need emergency cab fare, or even money to buy a new tube.
Mindset:
Getting in the right mindset is one of the most important things for winter commuting. If you constantly think "I don't want to do it," or "It is just too cold," then you will never be able to commit to riding in the cold. Once you convince yourself that it is actually an enjoyable experience to ride in the winter you will be much better off. Half the battle is the mental battle.
One thing I do is try to get excited about the ride in the morning, I love to ride anyway so I just remind myself of that fact and try to plan what will go on on the ride in, sometimes I switch up the route I take to add excitement, other times I'll try to get to work faster than I ever have before; basically I make it a game to ride to work, which helps me forget about the cold.
Once you finally get out and ride to work a few times you will see how much fun winter cycling can be, you'll be hooked. Check out more information at Icebike.org --they truly have all the answers you need.
-MC
Pictures of Home
and a visit to Poestenkill
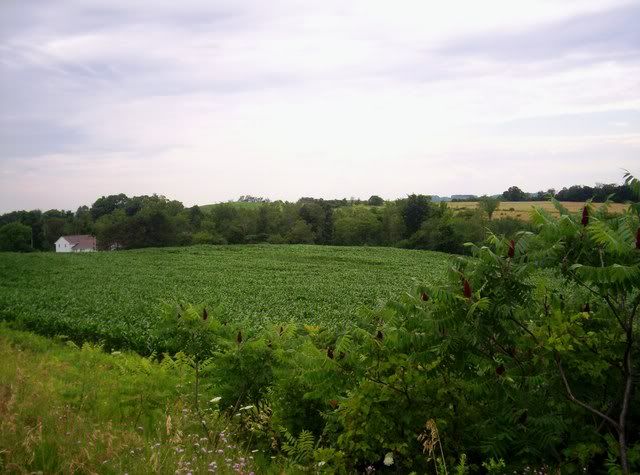
Some more pictures of our trip up north this past summer. These were taken in the area around Mrs. Doohickie's parents' home.
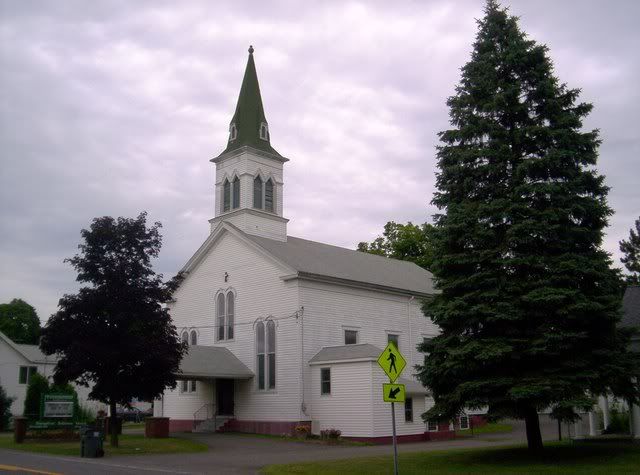
First, this is the church that Mrs. Doohickie went to when she was growing up:
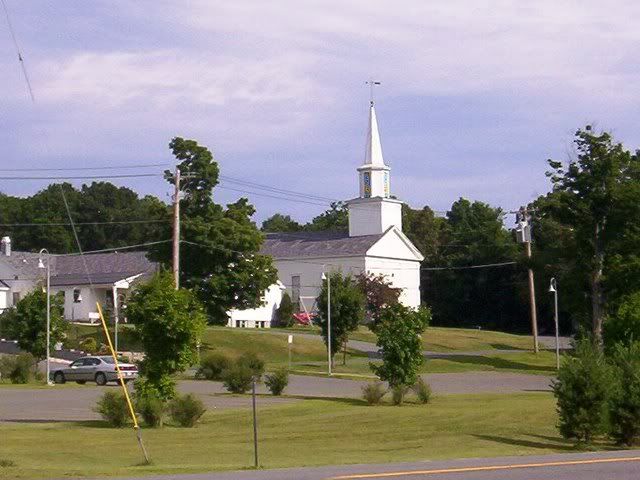
The church celebrated its 175th anniversary a few years ago.
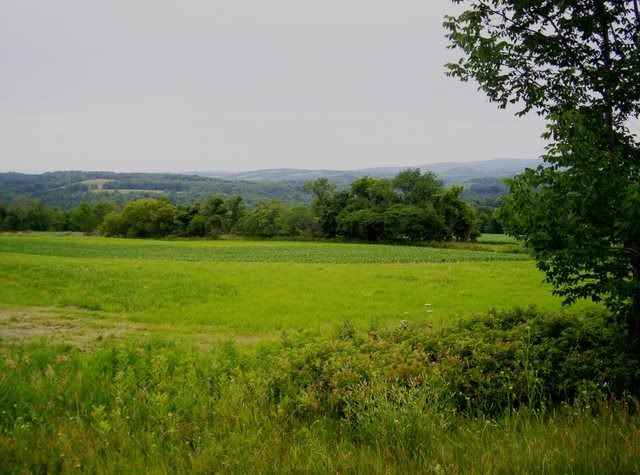
Traveling south from there and looking west you can see the rolling countryside that rolls on down to the Hudson River.
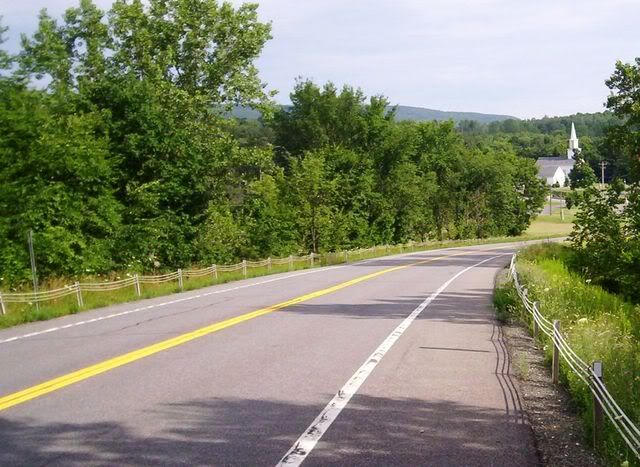
A nice little country road that meanders around...
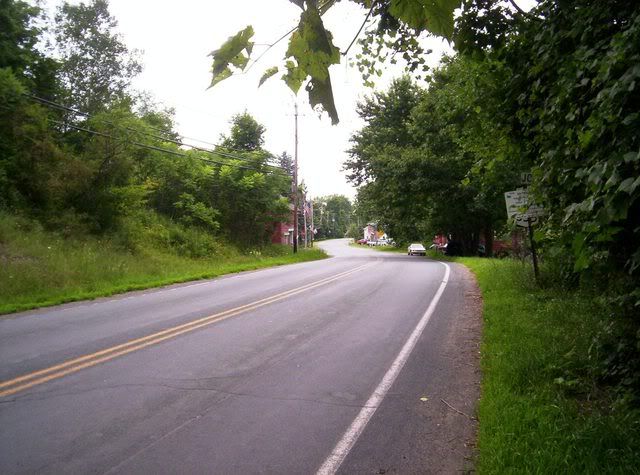
And eventually comes into the Town of Poestenkill. Poestenkill is named for Poesten Kill (I think "kill" is Dutch for "creek").
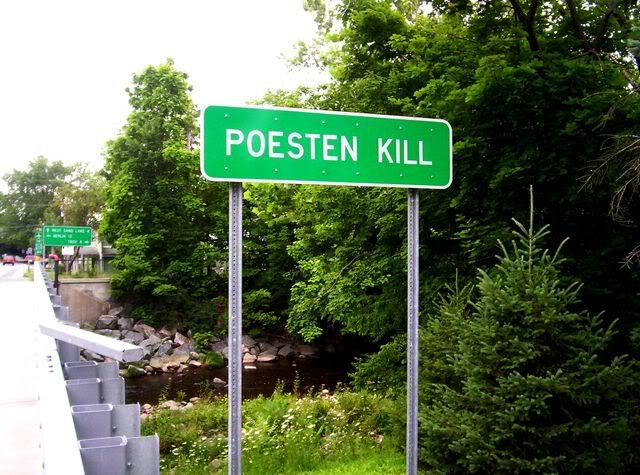
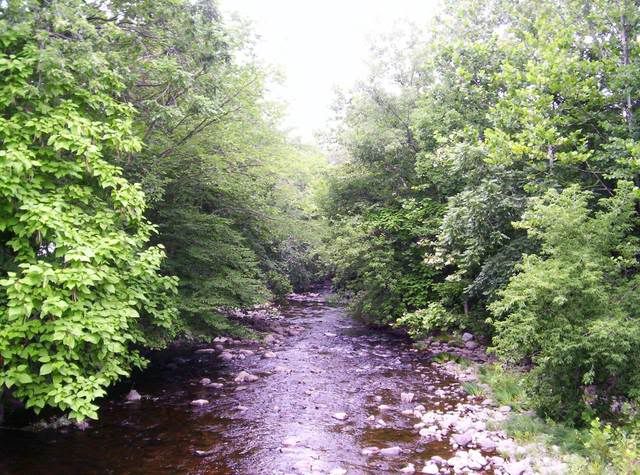
Looking east and west from the bridge is a charming little creek.

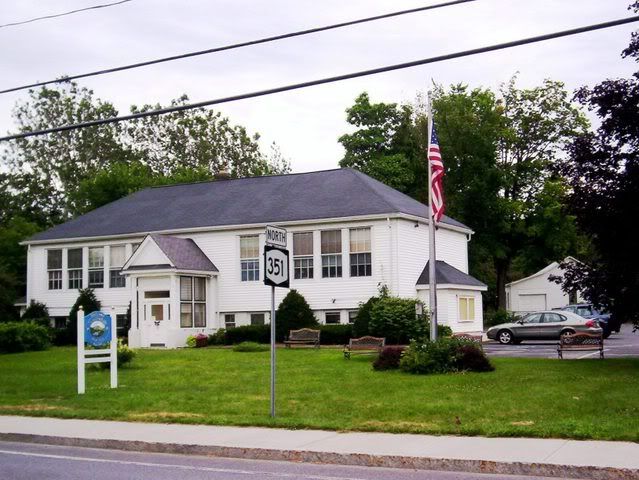
Beside the creek is their library and town hall.
Driving back I pass the Evengelical Lutheran Church,
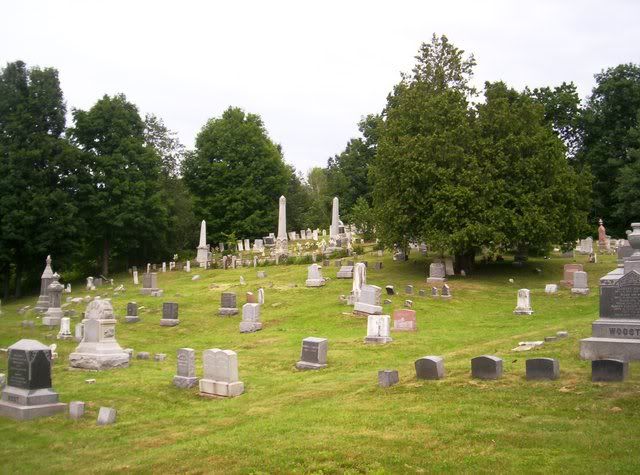
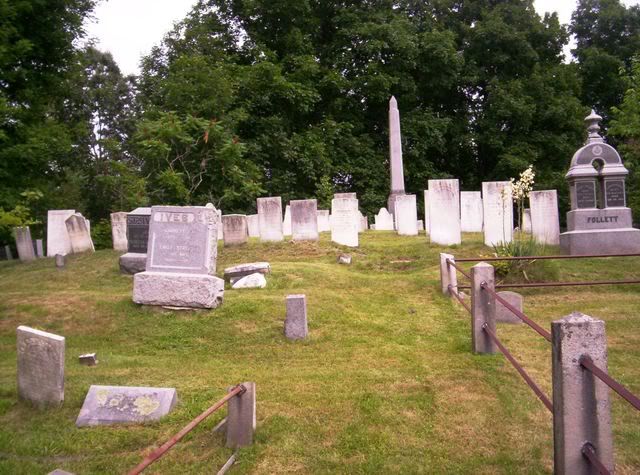
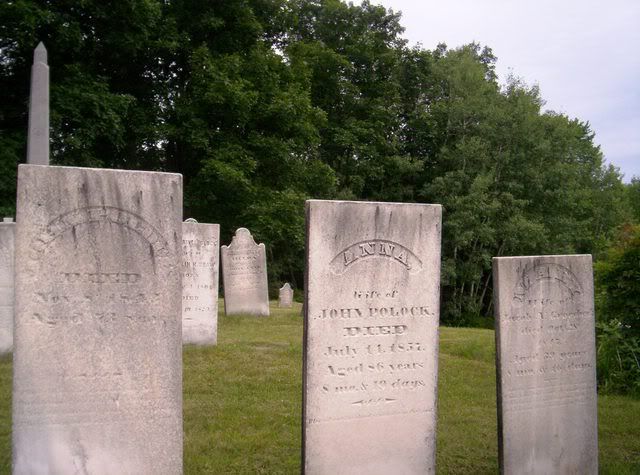
And as I leave town, I stop to visit some of the folks who won't leave town, ever again.

Some more pictures of our trip up north this past summer. These were taken in the area around Mrs. Doohickie's parents' home.
First, this is the church that Mrs. Doohickie went to when she was growing up:
The church celebrated its 175th anniversary a few years ago.
Traveling south from there and looking west you can see the rolling countryside that rolls on down to the Hudson River.
A nice little country road that meanders around...
And eventually comes into the Town of Poestenkill. Poestenkill is named for Poesten Kill (I think "kill" is Dutch for "creek").
Looking east and west from the bridge is a charming little creek.
Beside the creek is their library and town hall.
Driving back I pass the Evengelical Lutheran Church,
And as I leave town, I stop to visit some of the folks who won't leave town, ever again.
Saturday, January 24, 2009
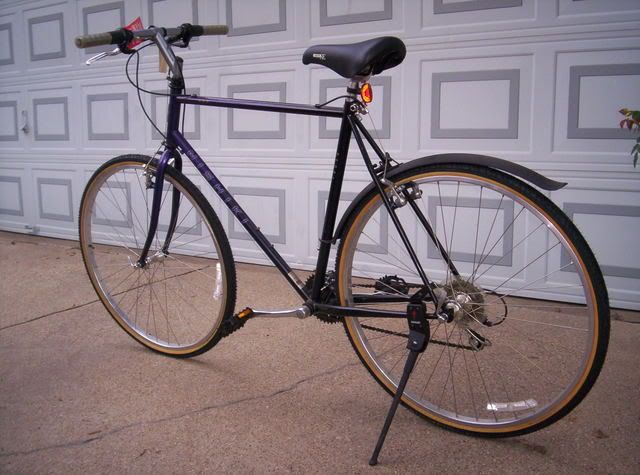
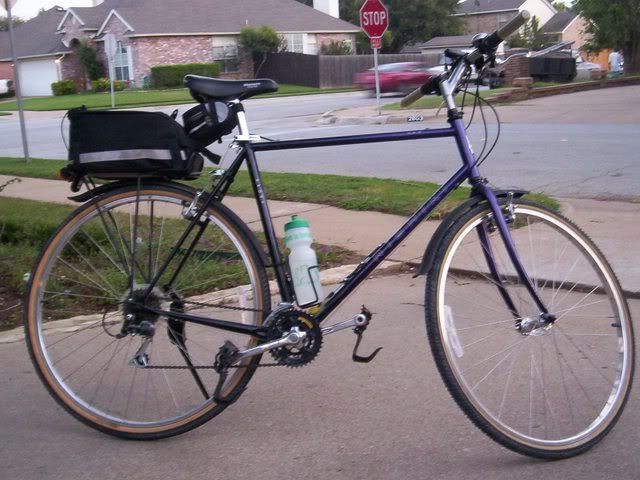
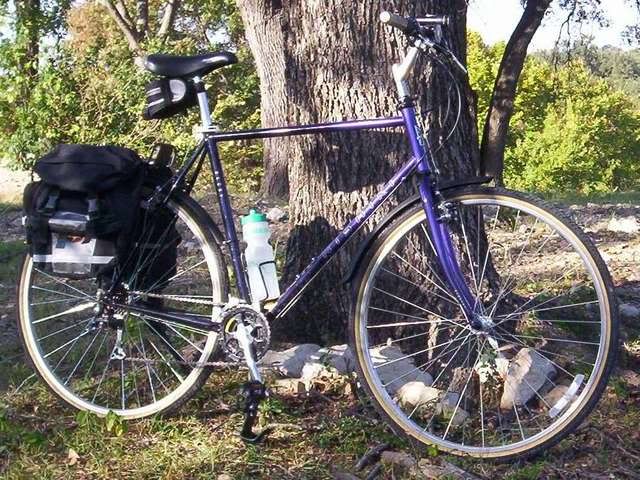
My Steed
Today it was 60 degrees and sunny, so I decided to take a ride and set up a photo shoot of the bike.
This is my go everywhere, do everything bike. I rely on it day in and day out. I ride anywhere from 10-100 miles a week; to and from work, to the grocery store, beer runs, to pay bills, to and from the gym, workout rides, and for sheer pleasure. It is my pride and joy, well...maybe that is pushing it a little, but I do love this ride.
I have added and subtracted certain things from the bike, here is the stock photo:

Here are some pictures of the bike taken today:


Specifications:
Model: Marin Muirwoods
Year: 2008
Model Category: Street
Model Series: URBAN
Size: 20.5"
Frame: Double Butted Cromoly with Edge 2 tubing with Double Butted4 Side seat and Chain Stays
Front Suspension: Cromoly Rigid 1 1/8" Fork
Rear Suspension: N/A
Shifters: Suntour Friction Bar End
Derailleur Front: Shimano C-100
Derailleur Back: Shimano Deore
Brakes Front: Forged Alloy Linear Pull
Brakes Rear: Forged Alloy Linear Pull
Brake Lever: Tektro R200 Road Levers
Pedals: Composite with Alloy Cage
Crankset: TruVativ X-Flow C 3.0 28/38/48
Chain: HG40
Cassette: Shimano HG30 11-32 8 Speed
Rims: Alex TA 20 Double Wall 32 Hole with CNC Side Walls
Tires: CST Urban 26x1.4
Saddle: Brooks B17 Standard
Seatpost: Alloy Micro Adjust 27.2mmx300mm
Stem: Bianchi Componteni 120mm -10 Deg
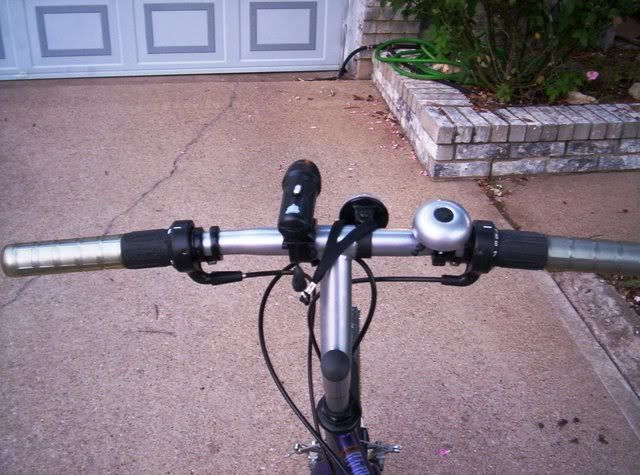
Handlebar: Alloy 25.4mm Drop Bar
Grips: Nashbar Cork Handle Bar Tape Black
Headset: Ritchey LB 1 1/8 Threadless
Things I have added on:
Planet Bike Hard Core Fenders
Delta Rear Rack Up to 50 lbs
2 Rear Folding Wald Baskets
Bike Burrito
Brooks B17 Standard
Headlight: Trustfire SCC P7 Flashlight
Taillight: Cateye TD1100
Schwinn 15 Function CylcoComputer
Tektro R200 Brake Levers
Suntour Bar End Shifters
Drop Bars
Nashbar Cork Handlebar Tape
I honestly believe this is a perfect example of a great modern commuter bike. I would recommend this bike to any person seriously considering cyclocommuting. It has the wonderful qualities of a steel bike--comfortable, stiff, and shock absorbing. It is set up with a triple chain ring making it easy to pedal up the steepest hill and speed back down, or cruise down the straight stretch. The bike is also very agile, which is good for riding in traffic, and down bumpy roads.
I am hoping to do some tours with this bike next spring and a few centuries as well. I hope you enjoy!
This is my go everywhere, do everything bike. I rely on it day in and day out. I ride anywhere from 10-100 miles a week; to and from work, to the grocery store, beer runs, to pay bills, to and from the gym, workout rides, and for sheer pleasure. It is my pride and joy, well...maybe that is pushing it a little, but I do love this ride.
I have added and subtracted certain things from the bike, here is the stock photo:

Here are some pictures of the bike taken today:


Specifications:
Model: Marin Muirwoods
Year: 2008
Model Category: Street
Model Series: URBAN
Size: 20.5"
Frame: Double Butted Cromoly with Edge 2 tubing with Double Butted4 Side seat and Chain Stays
Front Suspension: Cromoly Rigid 1 1/8" Fork
Rear Suspension: N/A
Shifters: Suntour Friction Bar End
Derailleur Front: Shimano C-100
Derailleur Back: Shimano Deore
Brakes Front: Forged Alloy Linear Pull
Brakes Rear: Forged Alloy Linear Pull
Brake Lever: Tektro R200 Road Levers
Pedals: Composite with Alloy Cage
Crankset: TruVativ X-Flow C 3.0 28/38/48
Chain: HG40
Cassette: Shimano HG30 11-32 8 Speed
Rims: Alex TA 20 Double Wall 32 Hole with CNC Side Walls
Tires: CST Urban 26x1.4
Saddle: Brooks B17 Standard
Seatpost: Alloy Micro Adjust 27.2mmx300mm
Stem: Bianchi Componteni 120mm -10 Deg
Handlebar: Alloy 25.4mm Drop Bar
Grips: Nashbar Cork Handle Bar Tape Black
Headset: Ritchey LB 1 1/8 Threadless
Things I have added on:
Planet Bike Hard Core Fenders
Delta Rear Rack Up to 50 lbs
2 Rear Folding Wald Baskets
Bike Burrito
Brooks B17 Standard
Headlight: Trustfire SCC P7 Flashlight
Taillight: Cateye TD1100
Schwinn 15 Function CylcoComputer
Tektro R200 Brake Levers
Suntour Bar End Shifters
Drop Bars
Nashbar Cork Handlebar Tape
I honestly believe this is a perfect example of a great modern commuter bike. I would recommend this bike to any person seriously considering cyclocommuting. It has the wonderful qualities of a steel bike--comfortable, stiff, and shock absorbing. It is set up with a triple chain ring making it easy to pedal up the steepest hill and speed back down, or cruise down the straight stretch. The bike is also very agile, which is good for riding in traffic, and down bumpy roads.
I am hoping to do some tours with this bike next spring and a few centuries as well. I hope you enjoy!
Review of the Bike Burrito
So around the beginning of December of last year I was looking for a classier alternative to a normal seat bag and while searching the internet I found the bike burrito. I first saw the burrito on the Epicurean Cyclist blog and almost immediately fell in love with the design. It seemed like a good deal, being hand made in the USA--simple yet elegant, and it also seemed to meet my needs, so I figured I would give it a try.
I recently bought a new Brooks B17 for my commuter and knew that the burrito would go so nicely with it. Once I went through the simple process of customizing my burrito, it was merely a week and a half and it was here. FYI the burritos are customizable to look how you want, they have a selection of fabrics you can choose from and you tell them what you want the shell fabric to be, and what you want the liner to be. For the outer shell I personally picked the brown and orange plaid, and a plain black for the inner fabric.
The burritos come in three sizes, basically small, medium, or large. I ordered the Grande, which is said to be good for touring. All burritos come with one strap, either white or black leather, or black nylon for those vegan cyclists out there. Also all burritos come with a strap that serves the purpose of placing your rear blinky on.
Here are a few pics of my burrito taken as I opened the envelope:
They actually come wrapped like a burrito you would get at a stand! Even with their own side of Tabasco sauce.

I decided to get two straps rather than one so that I could loop it through my Brooks. Though the designated one strap will work perfectly fine for those commuters without a Brooks saddle.

I have jammed mine with all the necessary tools to make it through any commute, or long ride that I will ever take. One spare tube, one sandwich baggy full of heavy duty rubber bands and zip ties, one patch kit (the non glue type), one pressure gauge, three tire levers, one park tool multi-tool, 3 wrenches 8mm/10mm/14mm, two medium sized bungee chords, and some spare cash.

Once rolled back up it looks very nice on the bike. I have taken four rides since it came and it isn't going anywhere. The leather straps have a death grip once tightened properly.

A view from behind, just so you can have another view of how it is rolled up and on the bike.

It has been over a month and a half since I ordered and received my Bike Burrito, and I have had plenty of time to test it out. After about two weeks I had to replace the leather straps, after losing the burrito when rolling over harsh bumps in the road. I ordered two acorn bags leather straps and it solved the problem for me. Otherwise I have only changed one thing, I swapped out the tube for a Nashbar tool kit that I got for Christmas(Review of Tool kit soon!). I then added a small seat bag behind the burrito to hold two tubes.
All in all I am very happy with the Bike Burrito; it is very well constructed, and after the new straps it serves my every need. I highly recommend this bag to any commuter or even tourer.
You can check them out and order one of your own from their website:
Bike Burrito
Check em out!
P.S. Buying a Bike Burrito will stimulate the failing economy!
I recently bought a new Brooks B17 for my commuter and knew that the burrito would go so nicely with it. Once I went through the simple process of customizing my burrito, it was merely a week and a half and it was here. FYI the burritos are customizable to look how you want, they have a selection of fabrics you can choose from and you tell them what you want the shell fabric to be, and what you want the liner to be. For the outer shell I personally picked the brown and orange plaid, and a plain black for the inner fabric.
The burritos come in three sizes, basically small, medium, or large. I ordered the Grande, which is said to be good for touring. All burritos come with one strap, either white or black leather, or black nylon for those vegan cyclists out there. Also all burritos come with a strap that serves the purpose of placing your rear blinky on.
Here are a few pics of my burrito taken as I opened the envelope:

They actually come wrapped like a burrito you would get at a stand! Even with their own side of Tabasco sauce.

I decided to get two straps rather than one so that I could loop it through my Brooks. Though the designated one strap will work perfectly fine for those commuters without a Brooks saddle.

I have jammed mine with all the necessary tools to make it through any commute, or long ride that I will ever take. One spare tube, one sandwich baggy full of heavy duty rubber bands and zip ties, one patch kit (the non glue type), one pressure gauge, three tire levers, one park tool multi-tool, 3 wrenches 8mm/10mm/14mm, two medium sized bungee chords, and some spare cash.

Once rolled back up it looks very nice on the bike. I have taken four rides since it came and it isn't going anywhere. The leather straps have a death grip once tightened properly.

A view from behind, just so you can have another view of how it is rolled up and on the bike.

It has been over a month and a half since I ordered and received my Bike Burrito, and I have had plenty of time to test it out. After about two weeks I had to replace the leather straps, after losing the burrito when rolling over harsh bumps in the road. I ordered two acorn bags leather straps and it solved the problem for me. Otherwise I have only changed one thing, I swapped out the tube for a Nashbar tool kit that I got for Christmas(Review of Tool kit soon!). I then added a small seat bag behind the burrito to hold two tubes.
All in all I am very happy with the Bike Burrito; it is very well constructed, and after the new straps it serves my every need. I highly recommend this bag to any commuter or even tourer.
You can check them out and order one of your own from their website:
Bike Burrito
Check em out!
P.S. Buying a Bike Burrito will stimulate the failing economy!
Welcome MetalChef87, a new contributor
I was going to just copy and paste some of the stuff from his blog, Bikes and Food, but I figured he would catch me eventually. Instead I'm inviting him to be a contributor to the blog. Welcome Ian, aka MetalChef87!
Friday, January 23, 2009
My 1994 Nishiki Sport XRS
Here is one of my commuter bikes. I bought it in August 2008, but this 1994 still had the original store price tags on it, the nubbies on the tires, everything. It is a Nishiki Sport XRS hybrid. In the 90s, "hybrid" meant a bike that is a bit of a cross between a road bike with a rigid diamond frame, and a mountain bike with flat handlebars and an upright seating position. The wheels are narrower than a mountain bike's, but wider than a road bike's, and the tires are also somewhere in between in terms of tread pattern. Some people still talk about hybrids, but the use of the term has dropped off some.
When I got it, it looked like this:
By adding a rack, a trunk bag and a water bottle, I had a basic commuter.
I also think you need lights and a bell.
Eventually I decided the trunk bag was just a little to small to hold what I carry to work, so I got panniers that hang off the rack.
Now, why is this a good bike for commuting?
. It has an upright seating position that lets me see traffic clearly (and also be seen)
. It has eyelets to mount the rack (not all bikes do)
. It is sturdy but lightweight
. It has hybrid wheels and tires that are relatively speedy but handle well on uneven city streets
. It has fenders to keep from getting wet when going through puddles
. It has toe clips
I haven't mentioned toe clips previously. Bicycle purists will say that the best pedals are "clipless pedals" where there is just a very small pedal that clips into a cleat on a specialized cycling shoe. Beginners are used to platform pedals (traditional pedals). For commuting, I like to go for the middle ground- toe clips. With toe clips it is easy to get your foot in and out of the pedals (easier than clipless pedals), but they are more secure than plain platform pedals and give you more efficient pedaling. They are a compromise between platforms and clipless that I prefer when I'm out in traffic.
My First Flippers
If you read this blog you know I've acquired several used bikes for personal use. I was talking to a guy at work and when the subject of my bicycle commuting came up, he said he had an old bike and asked if I wanted to buy it.
Last night I drove over to his house and looked at the bike. It turned out there were two. The first one is a 1960 Montgomery Ward Hawthorne, made by Hercules of England. This is the one that got me over there.
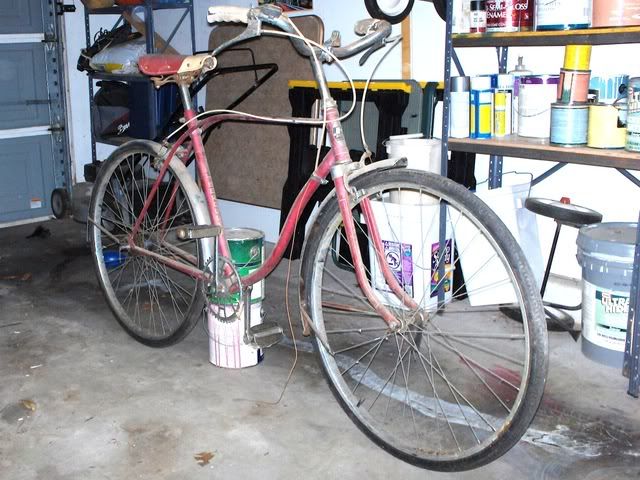
The original owner bought it when he was a paperboy; he's nearing retirement now. He hung onto the bike all these years but his wife told him he has to clean out his shop.
It's a handsome old cruiser, but far too small for me to use. I usually ride a 25" frame and do okay with 23" but this bike is a 20-incher. Basically it's too small for anyone over 5'-8". The good news is that the bike is largely intact, including fenders. The bad news is that the chain is missing and one of the crank arms is bent. So I guess that means I need to cruise swap meets for parts, unfortunately. This bike is fully restorable, but it will take some patience.
The other bike was thrown into the deal almost as an afterthought. It is in much better shape. It's a 1969 or 70 Sears bike, possibly an early Free Spirit, although the headbadge is missing so you can't tell. It could use new cables but it operates as is.
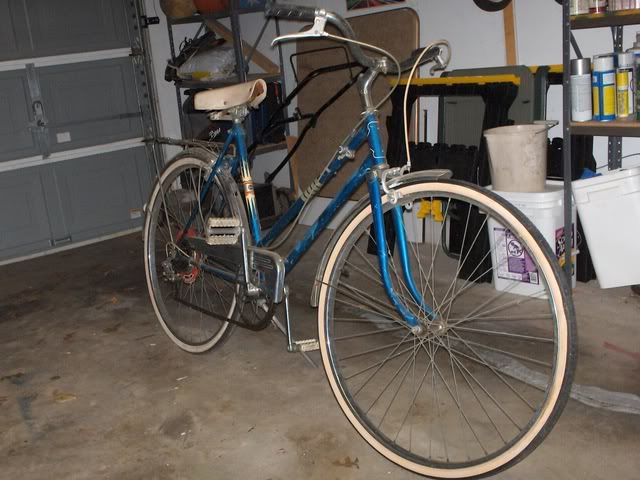
It has a Shimano Lark 5-speed derailleur in the rear and a single gear lever to operate it.
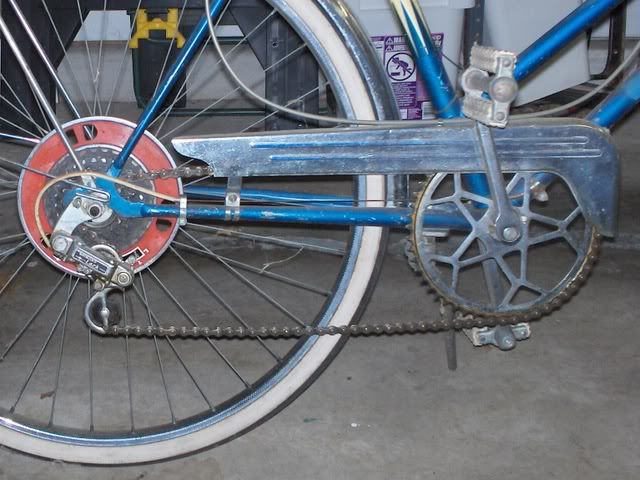

But that's not all; there is also a speed-activated gear changer in the hub.
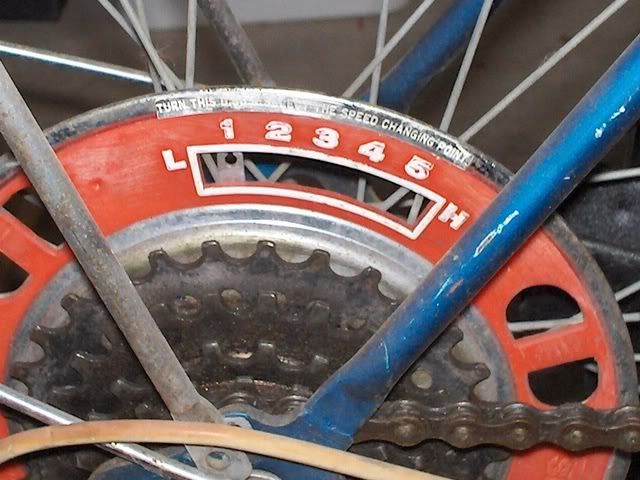
The chain guard on the wheel has an adjustment for when the internal hub changes gears. It needs to be set before you start riding. When you get up to a certain speed, an overdrive gear kicks in automatically.
Anyway, I got both bikes for practically nothing. The Sears model should be easy to fix up and "flip" or sell it to someone else. A similar bike with only 3 speeds is no the local Craigslist right now with an asking price of over $100 (not that it's selling at that price necessarily).
The Hawthorne Hercules is more of a project. When I posted about the bikes on BikeForums, though, the Herc drew a lot more attention, so maybe it will be effort well spent if I can get it fixed up.
Last night I drove over to his house and looked at the bike. It turned out there were two. The first one is a 1960 Montgomery Ward Hawthorne, made by Hercules of England. This is the one that got me over there.
The original owner bought it when he was a paperboy; he's nearing retirement now. He hung onto the bike all these years but his wife told him he has to clean out his shop.
It's a handsome old cruiser, but far too small for me to use. I usually ride a 25" frame and do okay with 23" but this bike is a 20-incher. Basically it's too small for anyone over 5'-8". The good news is that the bike is largely intact, including fenders. The bad news is that the chain is missing and one of the crank arms is bent. So I guess that means I need to cruise swap meets for parts, unfortunately. This bike is fully restorable, but it will take some patience.
The other bike was thrown into the deal almost as an afterthought. It is in much better shape. It's a 1969 or 70 Sears bike, possibly an early Free Spirit, although the headbadge is missing so you can't tell. It could use new cables but it operates as is.
It has a Shimano Lark 5-speed derailleur in the rear and a single gear lever to operate it.
But that's not all; there is also a speed-activated gear changer in the hub.
The chain guard on the wheel has an adjustment for when the internal hub changes gears. It needs to be set before you start riding. When you get up to a certain speed, an overdrive gear kicks in automatically.
Anyway, I got both bikes for practically nothing. The Sears model should be easy to fix up and "flip" or sell it to someone else. A similar bike with only 3 speeds is no the local Craigslist right now with an asking price of over $100 (not that it's selling at that price necessarily).
The Hawthorne Hercules is more of a project. When I posted about the bikes on BikeForums, though, the Herc drew a lot more attention, so maybe it will be effort well spent if I can get it fixed up.
Tuesday, January 20, 2009
The Ride to Work
The following was first posted on my Doohickie blog on December 24, 2008:
So back in February I started bicycling to work. The route is about 7-8 miles the way I go in the morning, sometimes longer in the afternoon if I'm up for a longer ride. I've ridden with one of the managers from my office a few times, but usually it's just me and the bike.
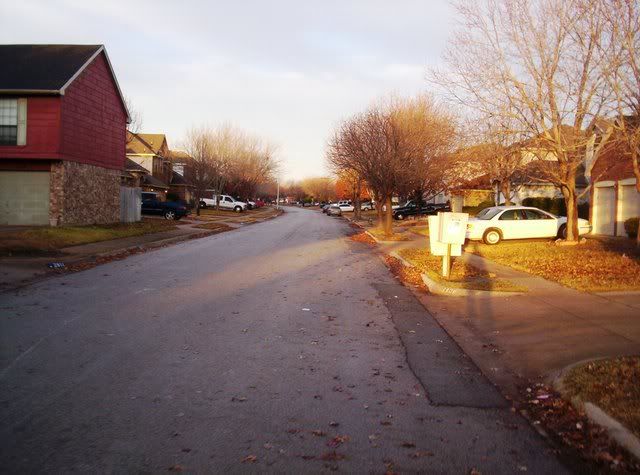
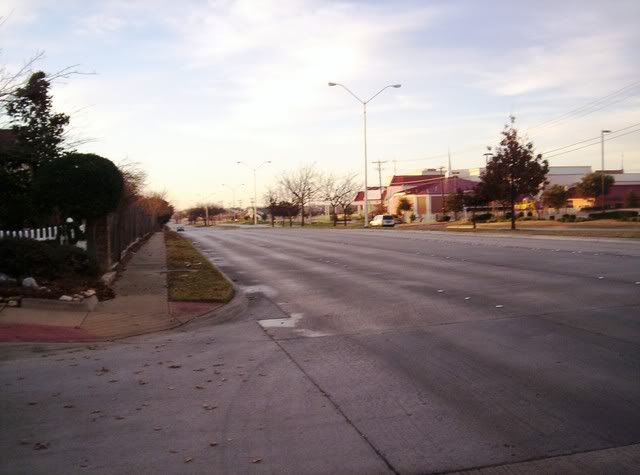
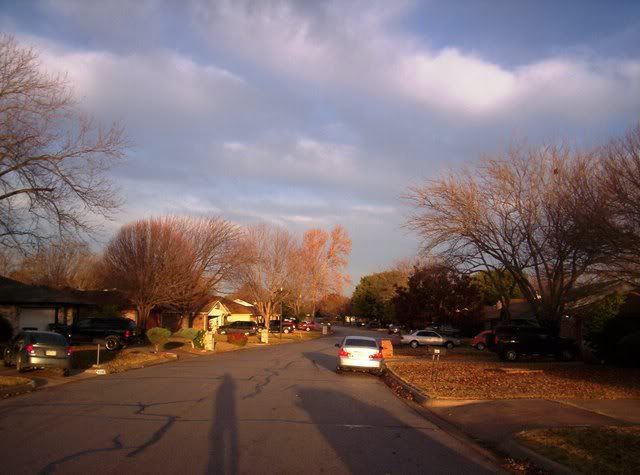
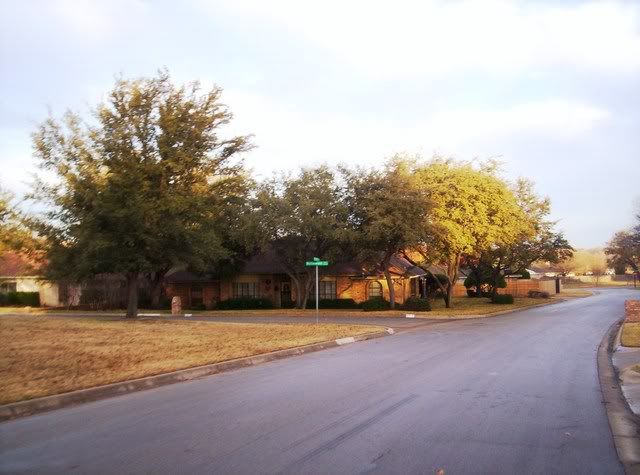
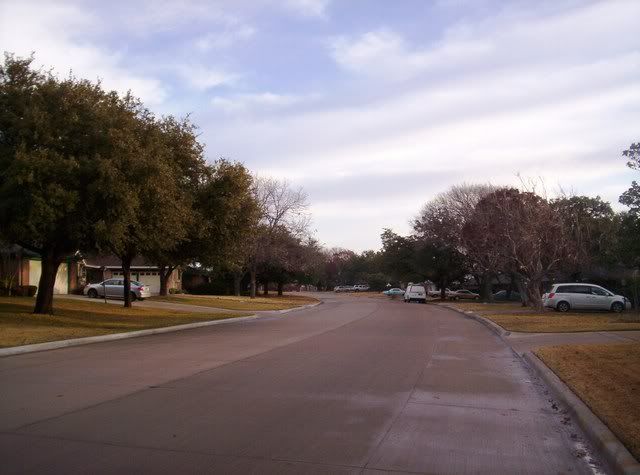
I finally got around to taking some pictures of the route. I didn't want to take pics on a work day because I wanted to wait until I had some extra time. Without further ado, here is the view down my street as I head out
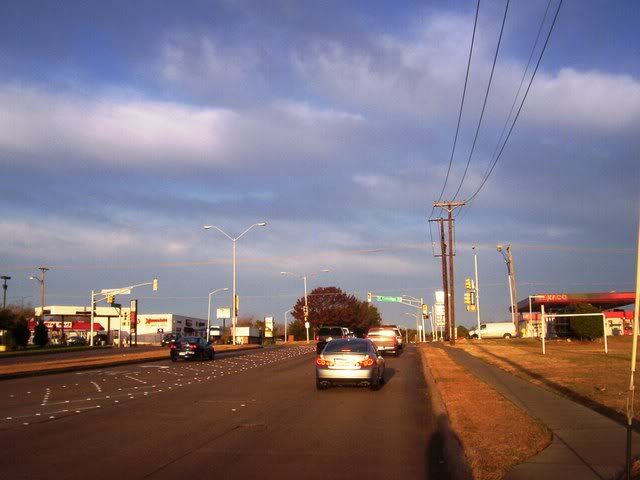
At the end of my street I come out to a major six-lane road. I have to make sure there is no traffic coming, because even though the speed limit is 40 MPH, cars traveling 60 are not uncommon.
Also, I make a left turn into a shopping center parking lot after only a block or two, so I need to get all the way over to the left,
...and make my turn.

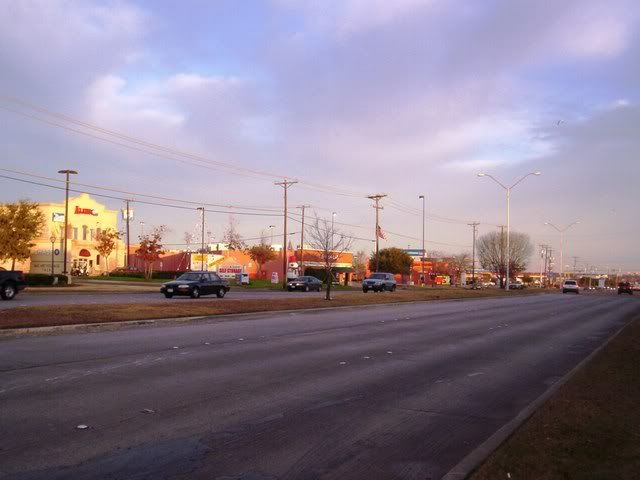
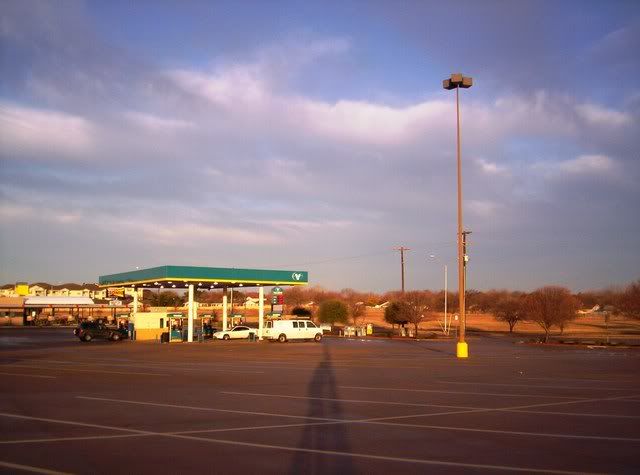
Then I drive through the parking lot past the Albertson's supermarket, a Valero gas station and a Sonic Drive-In.
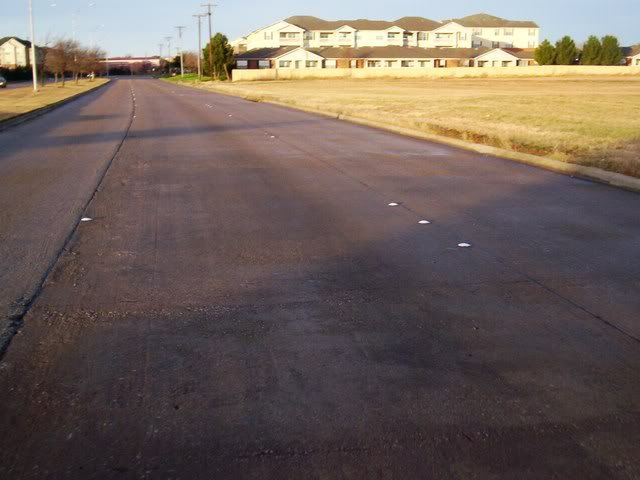
Then I make another left turn onto another major road; this one has a lot less traffic and I follow it for a half mile or so.
At the next light,
...I can either go straight or turn right. This morning I turned right,
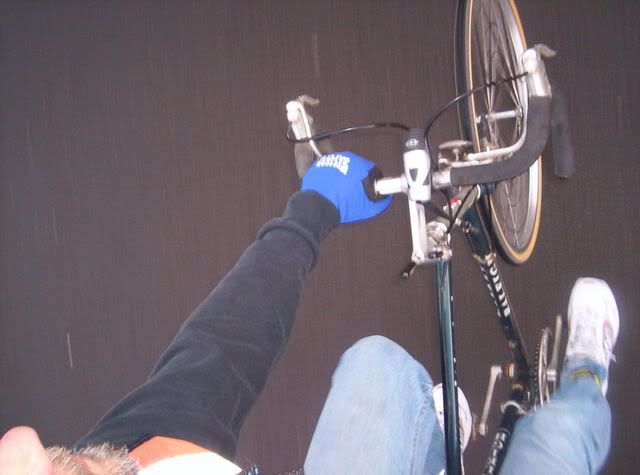
...down a lightly-traveled two-lane road with very wide lanes. Just to prove it is me, here I am.
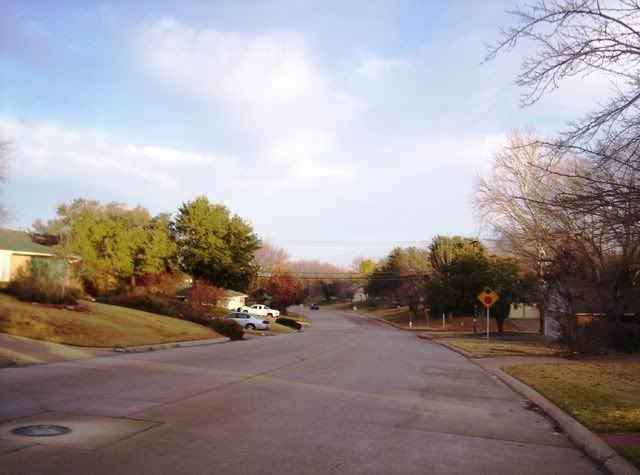
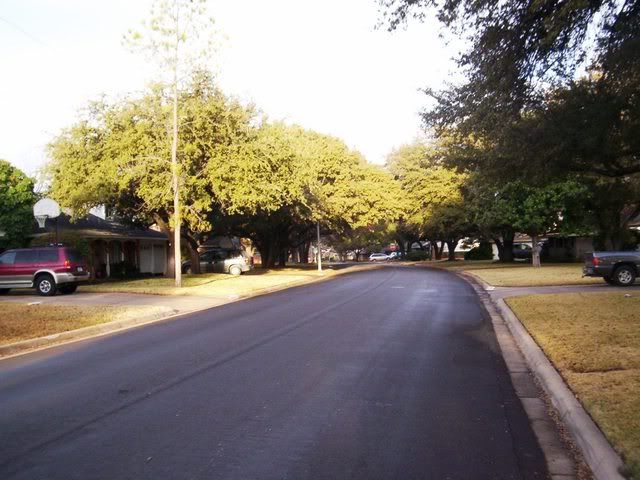
I take the first left to get into a residential neighborhood, and from here on I am in residential areas for most of the remaining ride.
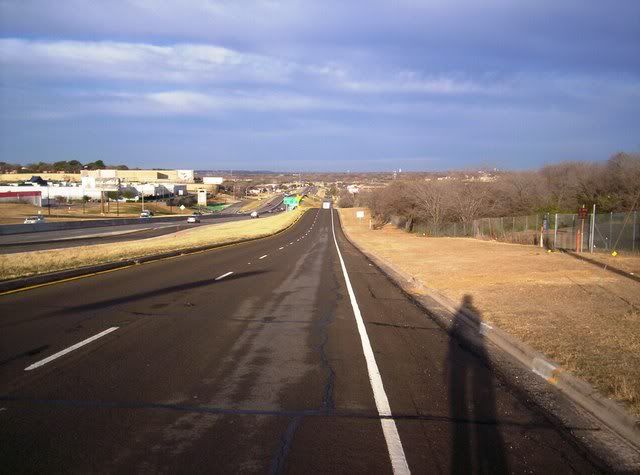
You may notice my shadow in a lot of these pics. That's a good thing; it means that for cars coming up behind me, I am well-lit and they can see me. The house in the center of the next picture belongs to a friend of mine. I usually wave as I pass the window, just in case someone inside is looking. Sometimes I get a wave back.
I cross over this bridge
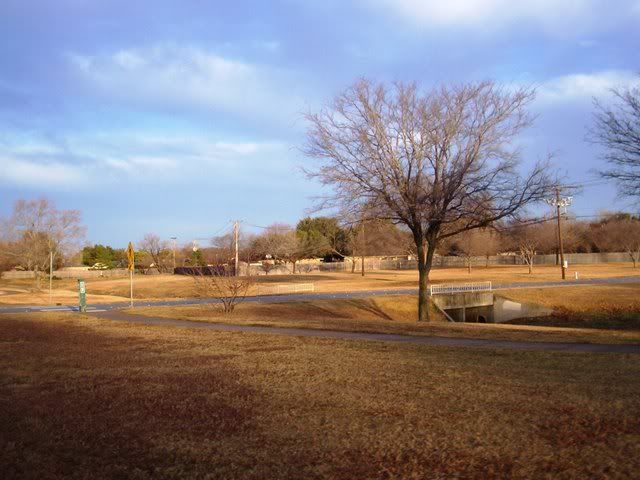
The only time I've gotten a flat during a commute was at this point.
Even though there is a wide, marked shoulder, that lane often has glass in it. After a gentle rise and then a gentle downhill, I come out at the crossing of a major street.
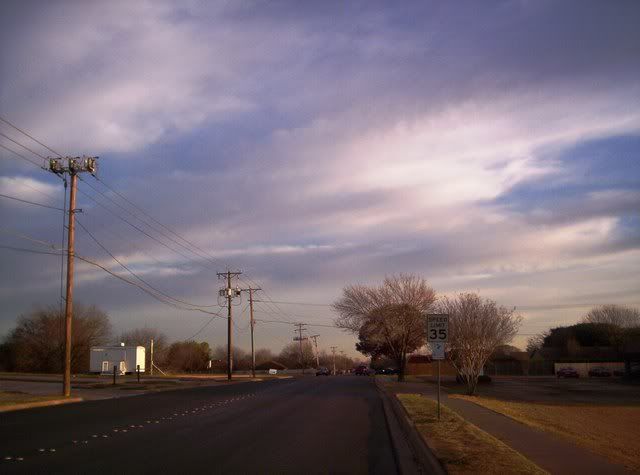
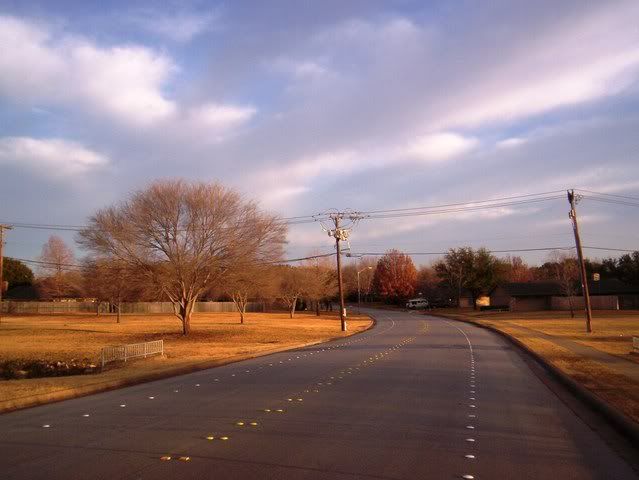
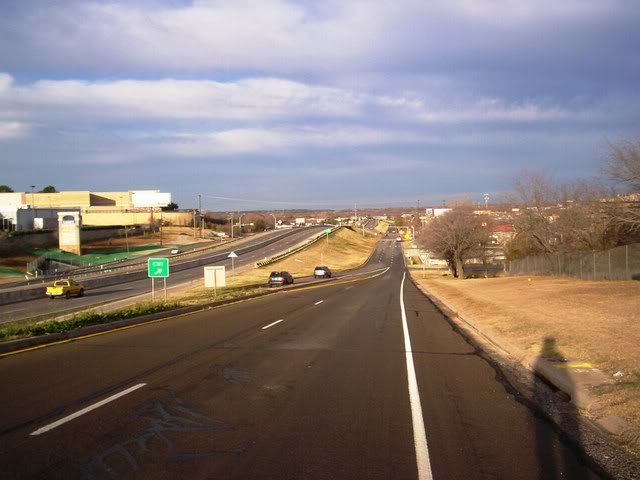
There is a high school on the right just after the light. I almost got right-hooked by a student and followed him to his parking spot for a little extra-curricular education about sharing the road with bikes! After the light I go down a few blocks and turn onto Wedgemont Circle. It really is a circle, with a constant bend to the left for quite a ways.
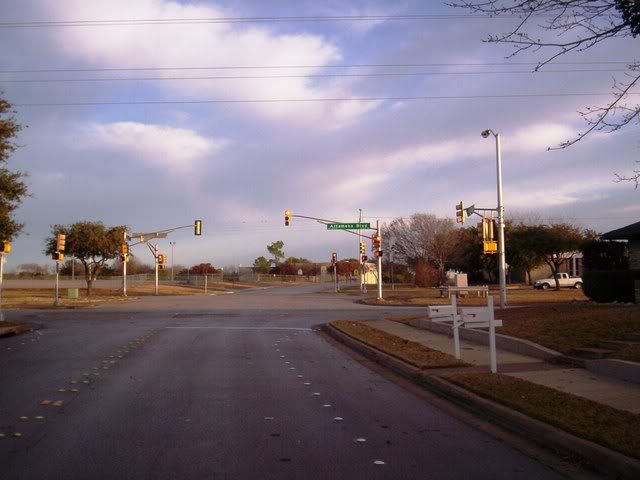
It comes out again at a busy street but again, there's a traffic light to help me get across.

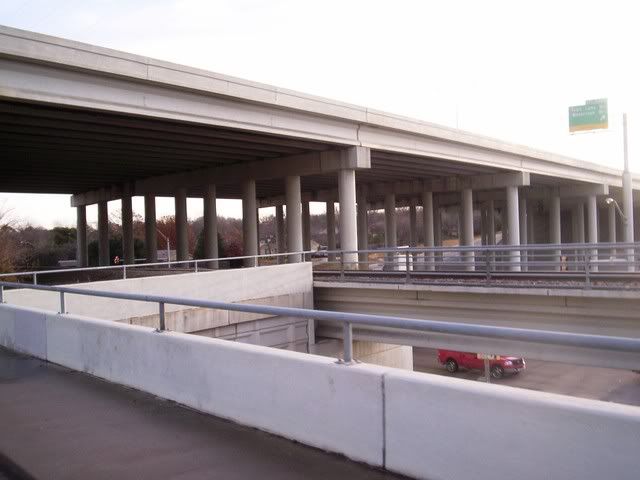
After crossing the busy street and the train tracks, I turn right and follow the train tracks up to the freeway.
This is an interesting and unique intersection. The side road I travel on is on the same level as the train tracks, each with its own bridge over the freeway access road, and the freeway itself is on an even higher level above. As a result I don't have to deal with any of the traffic getting on or exiting the freeway.
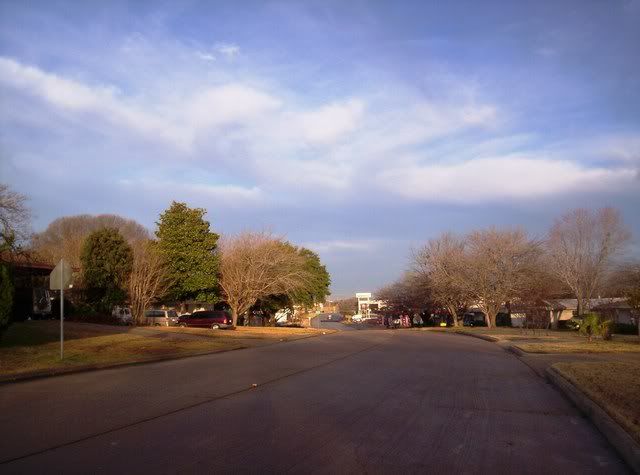
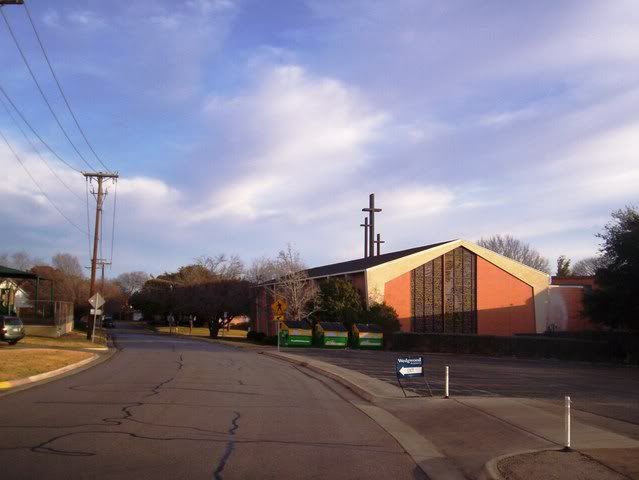
And I end up in yet another residential area after passing this church.
I turn left to ride parallel to, and a few blocks south of, the freeway, through a very nice neighborhood,
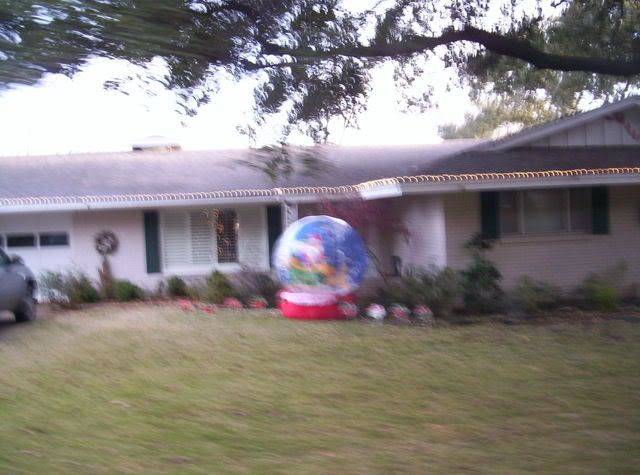
...although even nice neighborhoods are not exempt from tacky Christmas decorations!
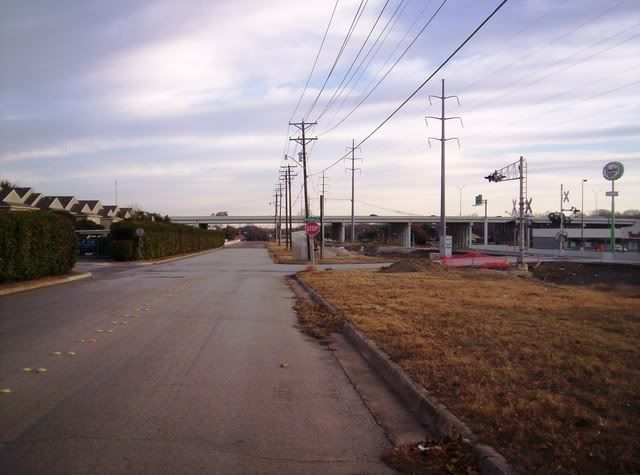
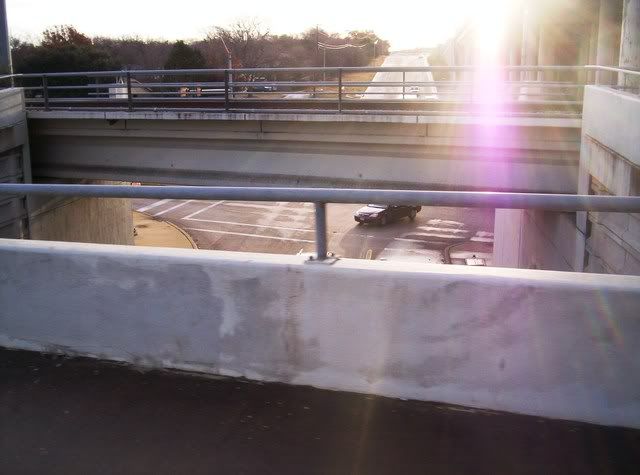
Finally, I come to one of the most challenging parts of my ride.
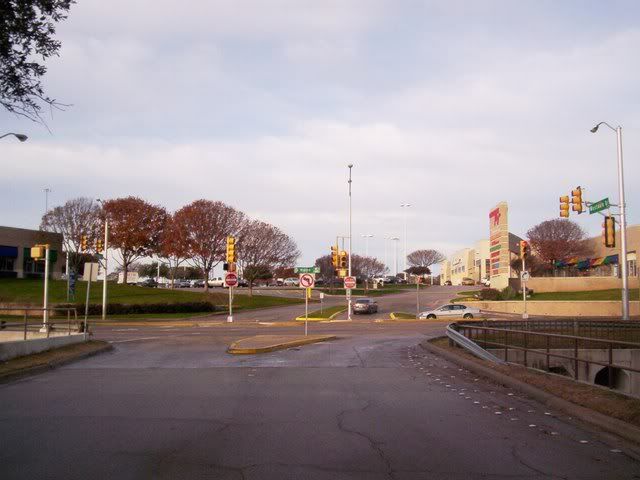
This is Hulen Street, one of the busiest streets in Fort Worth.
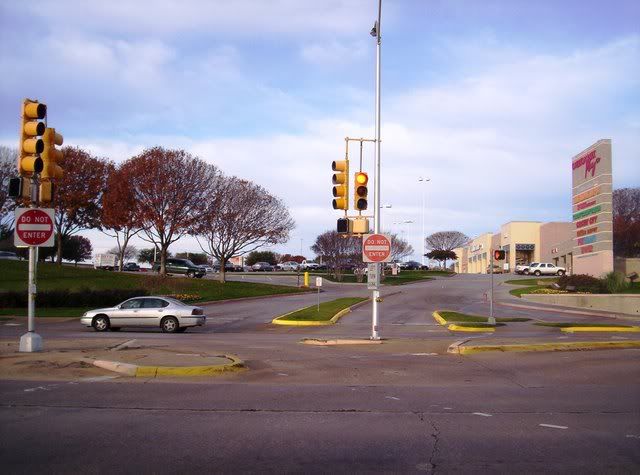
The proper way to cross this intersection is to dismount the bike to become a pedestrian, and cross on foot. Note that there is no way for vehicular traffic to go straight across.
The proper way.
Heh.
Anyway, once I get through I pass another Albertson's,
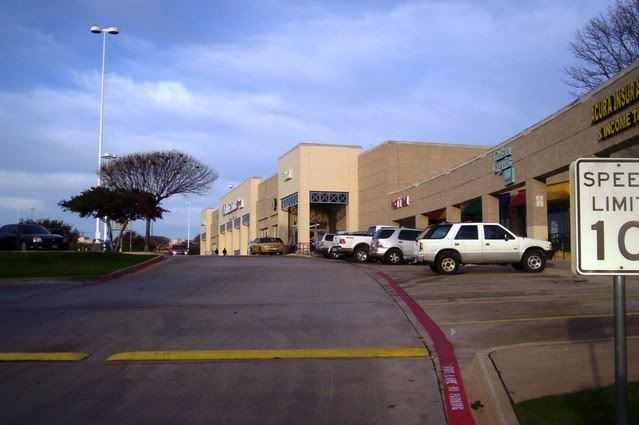
...a whole bunch of other stores, and finally a Home Depot.

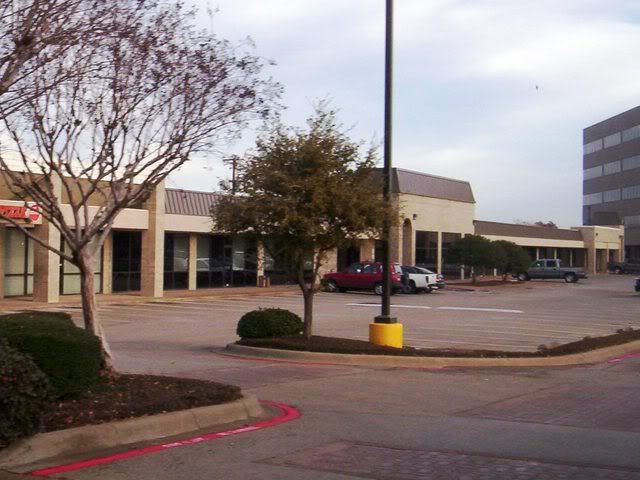
At this point I'm running through the parking lot of a shopping center that runs along the freeway access road. I cross over into the parking lot of an office building,
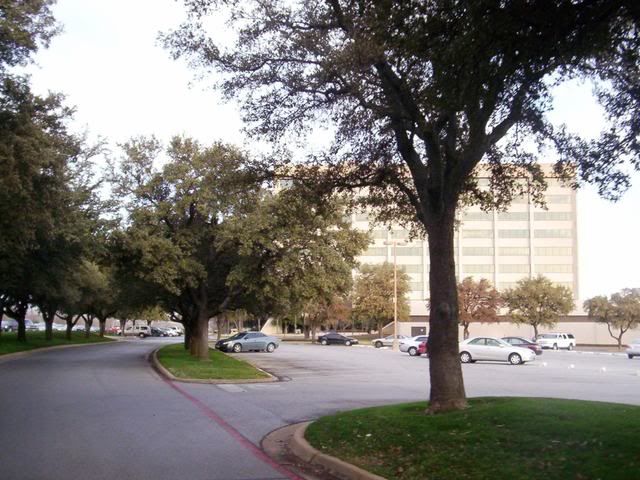
And then over to the parking lot of this fine establishment:
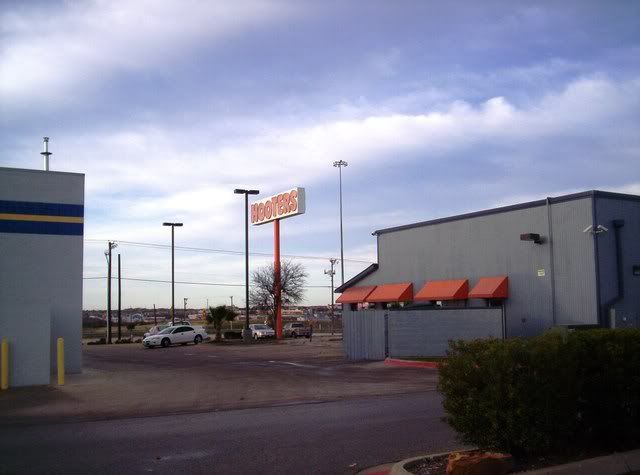
After Hooter's, I have to finally get on the freeway access road. It's all downhill from here, literally. In fact, I call this part of my commute "Hooter's Hill" since there's a Hooter's at the top. It's fun going down... WHEEEEE...
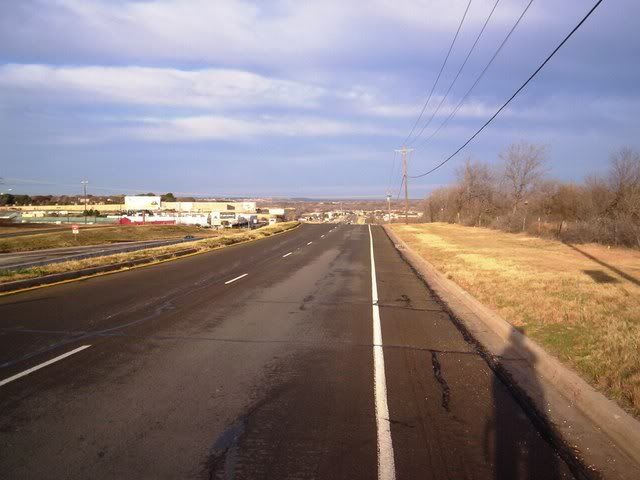
...EEEEEEE....
...EEEEEEE....
...EEEEEEE....
...EEEEEEE!
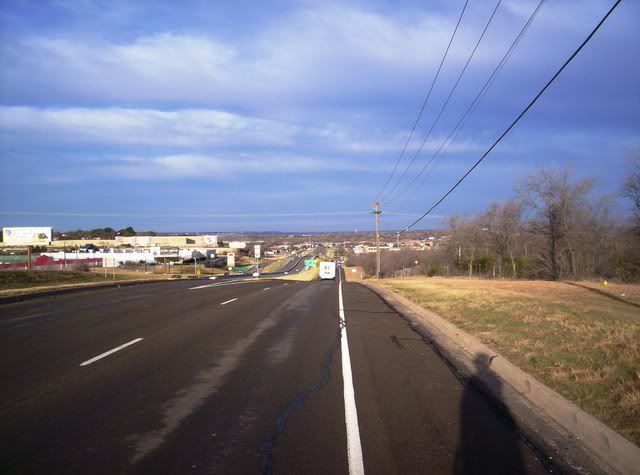
Unfortunately, I have to ride UP Hooter's Hill after work. :(
At the bottom, I cross through the traffic light, and there I am, at the nondescript strip mall where my office is.
So back in February I started bicycling to work. The route is about 7-8 miles the way I go in the morning, sometimes longer in the afternoon if I'm up for a longer ride. I've ridden with one of the managers from my office a few times, but usually it's just me and the bike.
I finally got around to taking some pictures of the route. I didn't want to take pics on a work day because I wanted to wait until I had some extra time. Without further ado, here is the view down my street as I head out
At the end of my street I come out to a major six-lane road. I have to make sure there is no traffic coming, because even though the speed limit is 40 MPH, cars traveling 60 are not uncommon.
Also, I make a left turn into a shopping center parking lot after only a block or two, so I need to get all the way over to the left,
...and make my turn.
Then I drive through the parking lot past the Albertson's supermarket, a Valero gas station and a Sonic Drive-In.
Then I make another left turn onto another major road; this one has a lot less traffic and I follow it for a half mile or so.
At the next light,
...I can either go straight or turn right. This morning I turned right,
...down a lightly-traveled two-lane road with very wide lanes. Just to prove it is me, here I am.
I take the first left to get into a residential neighborhood, and from here on I am in residential areas for most of the remaining ride.
You may notice my shadow in a lot of these pics. That's a good thing; it means that for cars coming up behind me, I am well-lit and they can see me. The house in the center of the next picture belongs to a friend of mine. I usually wave as I pass the window, just in case someone inside is looking. Sometimes I get a wave back.
I cross over this bridge
The only time I've gotten a flat during a commute was at this point.
Even though there is a wide, marked shoulder, that lane often has glass in it. After a gentle rise and then a gentle downhill, I come out at the crossing of a major street.
There is a high school on the right just after the light. I almost got right-hooked by a student and followed him to his parking spot for a little extra-curricular education about sharing the road with bikes! After the light I go down a few blocks and turn onto Wedgemont Circle. It really is a circle, with a constant bend to the left for quite a ways.
It comes out again at a busy street but again, there's a traffic light to help me get across.
After crossing the busy street and the train tracks, I turn right and follow the train tracks up to the freeway.
This is an interesting and unique intersection. The side road I travel on is on the same level as the train tracks, each with its own bridge over the freeway access road, and the freeway itself is on an even higher level above. As a result I don't have to deal with any of the traffic getting on or exiting the freeway.
And I end up in yet another residential area after passing this church.
I turn left to ride parallel to, and a few blocks south of, the freeway, through a very nice neighborhood,
...although even nice neighborhoods are not exempt from tacky Christmas decorations!
Finally, I come to one of the most challenging parts of my ride.
This is Hulen Street, one of the busiest streets in Fort Worth.
The proper way to cross this intersection is to dismount the bike to become a pedestrian, and cross on foot. Note that there is no way for vehicular traffic to go straight across.
The proper way.
Heh.
Anyway, once I get through I pass another Albertson's,
...a whole bunch of other stores, and finally a Home Depot.
At this point I'm running through the parking lot of a shopping center that runs along the freeway access road. I cross over into the parking lot of an office building,
And then over to the parking lot of this fine establishment:
After Hooter's, I have to finally get on the freeway access road. It's all downhill from here, literally. In fact, I call this part of my commute "Hooter's Hill" since there's a Hooter's at the top. It's fun going down... WHEEEEE...
...EEEEEEE....
...EEEEEEE....
...EEEEEEE....
...EEEEEEE!
Unfortunately, I have to ride UP Hooter's Hill after work. :(
At the bottom, I cross through the traffic light, and there I am, at the nondescript strip mall where my office is.
Subscribe to:
Posts (Atom)